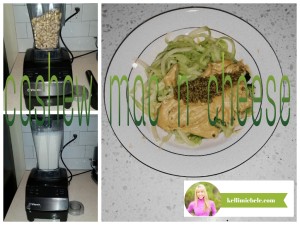
Cashew mac n cheese
Who knew!
Did you ever think you could make cheese or milk out of plain ol’ pure nuts? Almonds, cashews, sunflowers!
I remember my first time trying nut cheese and it was amazing. Then the rest is history.
Who can’t forget our famous Kraft box mac n cheese?! Growing up, this was one of my favorite meals, more like an after school daily addiction! I was amazed to find there are ways to create the same tastes of something we love, but in a way to make it more nutrient packed.
Through my exploration in the kitchen, I present you with my recipe for Cashew Mac n Cheese! For my noodles, I used zucchini (cut through the spiraler tool), but you can use a nutritious pasta like Ezekiel Sprouted Grain Penne Pasta for a healthier pasta choice.
I first started out making a big batch of cashew milk but then I got creative and divided my milk into cashew cream which then became cashew mac n cheese. Stay with me. That’s the beauty in cooking with nuts as they are super versatile.
Here’s the secrets:
1 cup raw cashews (not roasted and unsalted)
1 1/2 cups filtered water
1/2 tsp turmeric powder
2 tbsp nutritional yeast
pinch of pink himalayan or sea salt
- First, soak your cashews. You can do this for about 2-4 hours or even overnight. Place your cashews in an air tight container with just enough water to fill the top of the cashews.
- Once soft, they are ready. Pour out the water, rinse, and place cashews in a blender, or high-speed Vitamix.
- Next add about 1 1/2 cups of water (filtered is best) to start with and pinch of pink himalayan or sea salt. **If you are making cashew milk, here you can add 2 or 3 dates to sweeten it up instead of salt
- Blend and check consistency. For cashew cream, you will want it to be rather thick so think of consistency of sauce. If you need to add more water, try a little at a time and keep blending.
- Remove from blender, place in bowl. Add in 2 tbsp of nutritional yeast and 1/2 tsp of turmeric. This gives it that cheesy flavor and is also full of Vitamin B so its a win-win.
- Give it a taste. You may need to add a pinch more of salt or throw in some more nutritional yeast, but soon it will be tasting just like you remember….some good ol cheese sauce!
Once you get your sauce tasting delish, you can transfer it over to the stovetop to heat it up before you place over your “pasta.” This usually just takes a few minutes and then it’s ready to serve.
Add a protein or even handful of cooked quinoa (pictured below) to spice it up a bit more.
Enjoy!

|
Leave a Reply